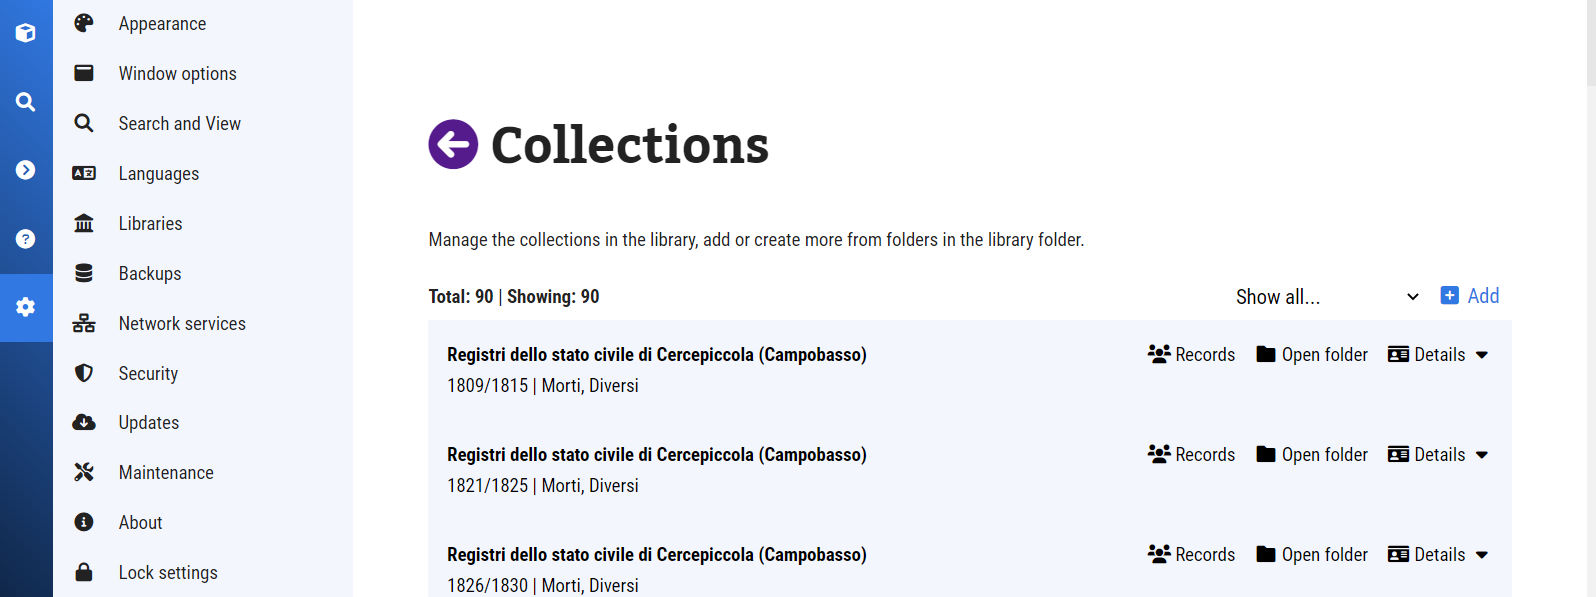
Collections management
Collections are at its core a group of images on a single folder. When a library is imported with metadata, the additional information for each collection’s folder is entered into the internal database and optimized for searching and viewing operations. When information is missing or innexistent, Collections can be created manually.
To access the Collections management screen, click the Collections button from the library. It will open a screen similar to this:
Collection options
There are two types of collections in the system: “Image collections” and “Indexed collections”. The first one contains only images, while the second contains also linked indexes.
To edit a collection, click Details and then Edit. You can change all the attributes of a collection, including it’s type and source folder.
Working with records
When a collection has been marked as “Indexed”, the Records option becomes available. It will open a modal window with several options:
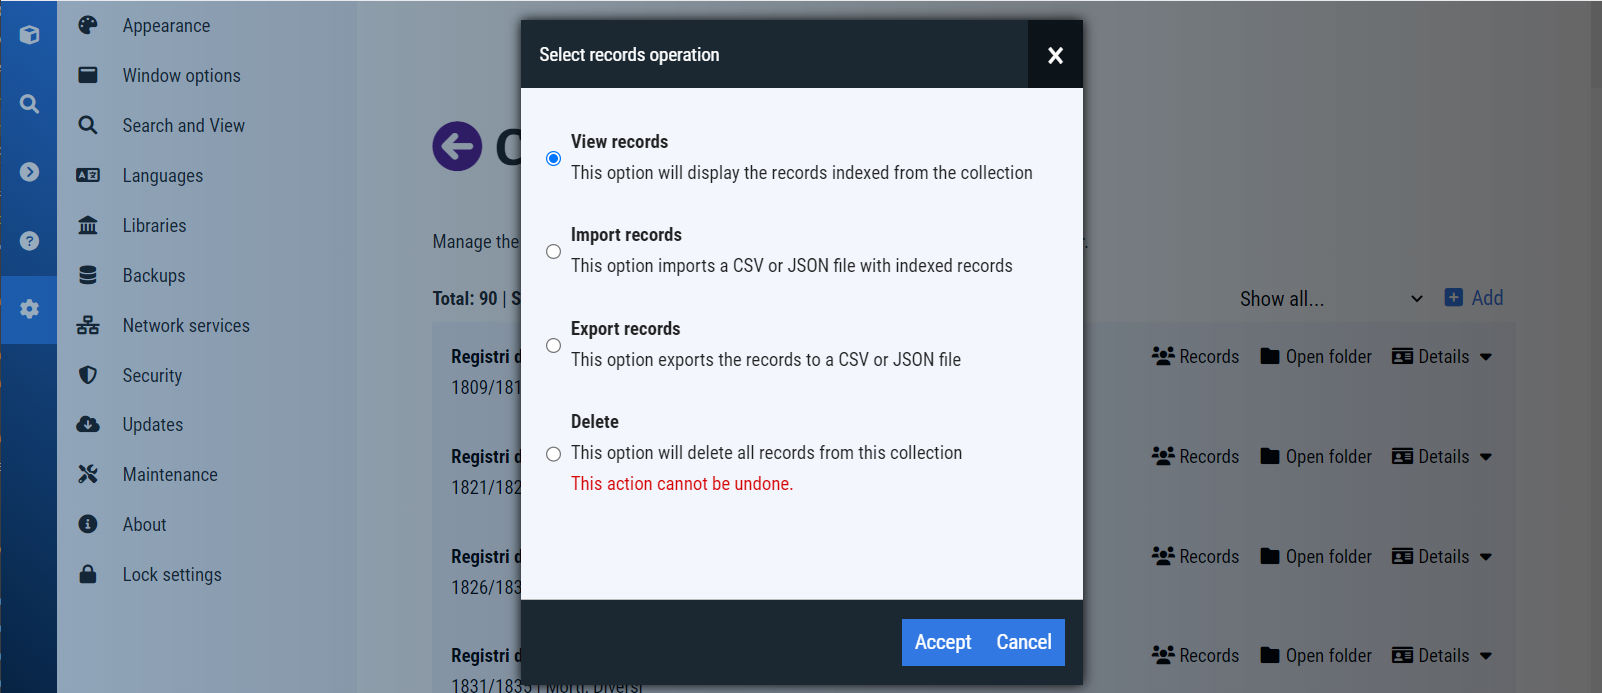
The options available are pretty self explanatory (View, Delete), save for Import and Export options that require special attention.
Import indexed data
When you select Import, it opens a new modal where one can either create or import a descriptor file. A descriptor file contains metadata that explains to the DRR how to interpret the index file, by identifying certain records. When you choose to Create an index descriptor, you are presented with the following options:
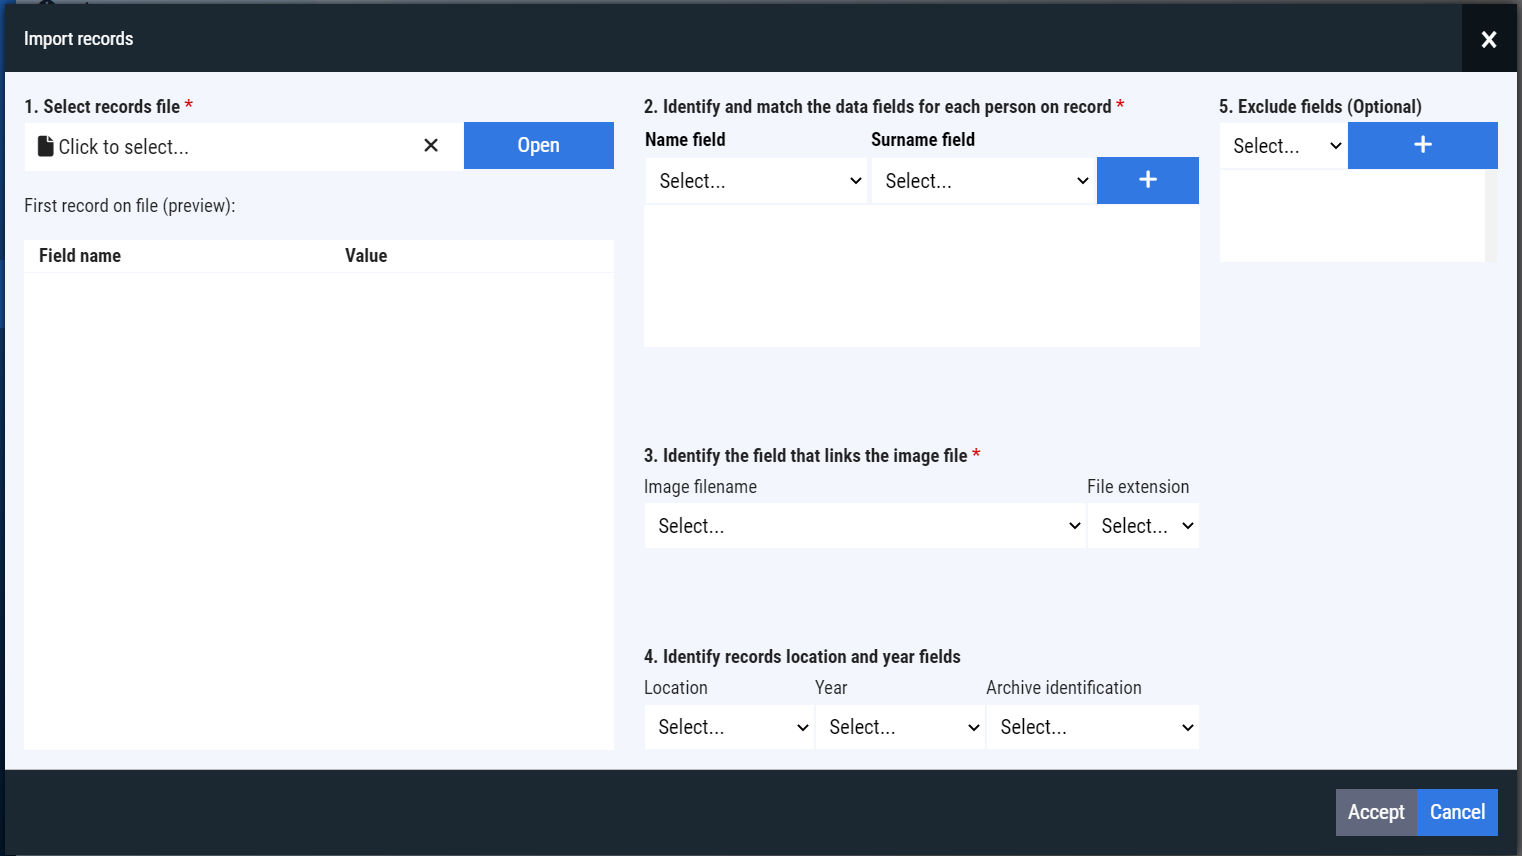
In this screen, follow these steps:
- Select the index file. This file must be a text file with the
.csvextension, inutf-8encoding, and use the semi colon character as data separators (;). The system will import and display the fields and data of the first record on file. - For each identifiable person on record, select the appropiate fields for name and surname, then click add. Repeat until all the people has been identified.
- Select the field that contains the image file name. If the field does not contain the extension and this appears on another field, select that one as well.
- [Optional] Select other fields that can be used for search operations, such as location, date (year), and archive reference number or identificator.
- [Optional] Select other fields that you want to exclude from the database. All the fields not excluded will be visible for the users.
When you are ready, click “Accept” to start the process.
Export indexed data
This option is very simple, and only needs you to select the destination folder. The system will export not only the original imported data, but also the index.descriptor.json file that was used to import it. You can use these files to import and restore a collection records.
Note
If you have multiple indexes that use the same format, you can apply the same index descriptor.